The Atenas Jacket

I guess I’m on an Itch to Stitch kick, because the next piece in this wardrobe chain is the Atenas jeans jacket. I’ve been wanting to tackle this type of jacket for awhile, as I love the look of a denim jacket layered over spring/fall skirts and dresses. The blue denim one that I own has served me well, but the sleeves are obviously too short on me, as long sleeved RTW usually is. So I have to wear it with the sleeves rolled up as a 3/4 length jacket, which does somewhat limit its usefulness.

For this initial version, I made it from black denim that my mom gifted to me along with the pattern. After a great deal of debate, I made it in a size 10, C cup, graded to 12 in the hips. The result is quite fitted in my midsection if I button it, though not uncomfortably so. Honestly, though, I never button denim jackets, so it really doesn’t matter! And since my old basic black layering jacket finally got too worn and snug, it’s good to have a new replacement piece in my closet. (That old jacket lasted me for about 15 years, though –wait, have I really been writing this blog for that long?!)

Just ignore that all of my best shots have little limbs sticking out of odd places, ok? #momlife

Overall, the instructions on this were great. I was a little worried about the welt pocket, because the last time I made them was about 7 years ago, when I was binge sewing Sewaholic Thurlow pants. I did a little test run with some scraps, and it helped a lot. Really, the main problem that I had with this was that, despite double checking my sleeve against the pattern piece, I somehow managed to sew both sleeves in backwards, and didn’t notice until I tried it on. Which, of course, was already after I’d trimmed the seams and flat felled them! I had a little breakdown over that, but thankfully, the kids were content to watch tv and let me bust out my seam ripper, and I was able to get them fixed that same day. Not as nicely, to be honest, since I ended up just lining the cut edges up, serging them, and doing a much more narrow topstitch line. But it worked, and I still had the jacket done in time for my birthday, which had been the goal all along.

A few other details: I did the faux pockets on this one, as I was more concerned about the fit than the extra pockets. And though I cut out the tabs for the lower band, I ended up leaving them off the final jacket, since I wanted to be sure of the fit and I was getting pretty crunched for time by this point, even pulling hours of sewing each night last week to get it done by my self-imposed deadline! It’s just as well, since I would have needed 4 extra buttons for that, and it had also been awhile since I installed jeans hardware. But I only broke one button and I have a few spares of this type for whenever I get back into sewing jeans with an actual buttoned waistband.

I think I would make a few tweaks the next time, namely adding just a tiny bit more width across the upper back. It got more comfortable as I wore it that day, but it did feel a little snug initially, thanks to my killer flutist upper back muscles. I also need to add a little more length to the side pockets, because I don’t know if it’s the lining fabric I used, but it barely reached the folded front facing to get caught in that seam. I already have a vision in my head of turning the stack of jeans in my refashion pile into another one of these, though I’m definitely taking time off for some quicker projects before I tackle that!

To move on in the chain, I initially wanted to do a top, and will still likely come back to that. But after some brainstorming with my color savvy quilter mom about what would work with the pants that isn’t just a boring neutral, I realized I don’t have the right color in my stash. So that’s coming in the future, but in the meantime, I’ve started another bottom piece.

I also managed a nice little fabric shopping spree, thanks to a gift card from my in-laws at Christmas and some birthday money that I was given. So I bought myself 7 new pieces of fabric! One of them will actually work nicely for this particular chain, I believe, and several of the others will work well together for a warmer weather one. Though I generally love the fabrics that I get from my mom at Christmas, it’s been awhile since I was really able to pick out much for myself, so that was fun!

Matcha madness

Now that it’s December, I figured I’d better do a little bit of catchup on some unblogged things. After all, it’s Top 5 season!

IMG_5402This make is actually getting close to three months old! It’s just been really hard to get pictures of it, and I’m honesty still on the fence about whether it was a success. But here goes.

I liked how my last Matcha top turned out in the end, in spite of my sizing issues. So I decided to give it another go. I traced two sizes smaller than the original top, and pulled out a lightweight silky print that had been languishing in the stash for a decade or so. Long story short, a) I really need to find some finished garment measurements for this thing, and b) bad fabric choice. It was still huge, and boxy, and just didn’t have the drape that this shirt seems to need.

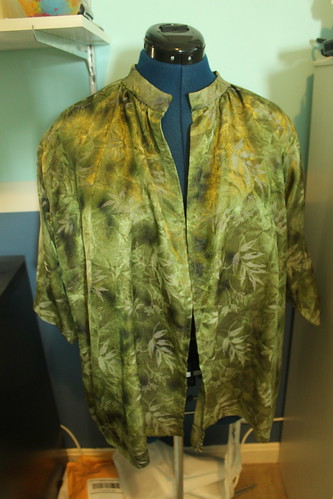
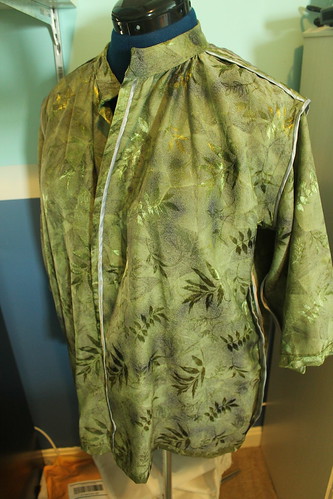
I played around with cinching it in, and toyed with the idea of making a belt with the scraps that are left, but decided against that, because the silky fabric would shift out of place and into unflattering territory fast. I actually did find a wide belt elastic that’s nearly a perfect match, but haven’t successfully located a suitable buckle to make that. So since the tied fabric belt made me look like Robin Hood anyway, I decided to err on the side of art teacher chic and turn it into a kimono style jacket. I guess that means this counts as the second piece for my Refashion Redemption Project. (The only picture I actually have of me wearing this is an Instagram selfie. But it’ll have to do. Incidentally, I’m also wearing one of the nursing camisoles I was never able to do a modeled shot of because I was super pregnant at the time.)

IMG_5404I’m really glad I’d taken the time to finish all of the insides with a bound seam allowance, since they’re visible now! I should have cut the strips wider, but live and learn. The bias strips were actually a recycle from an old bias cut, pull on skirt that I sewed ages ago. Refashion bin success!


another finished jacket

This is the jacket #120 from the 3/11 issue of BurdaStyle (one of the last magazines I got from them.)I finished this up on Thursday night, and I’ve worn it twice already! This pic was from yesterday afternoon, courtesy of my boyfriend–we went to his place to hang out and watch a movie after a late lunch (or early dinner) with his family. The furball is one of his two dogs–this one has absolutely loved me from day 1, and likes to hang out close by whenever I’m around!

I’m happy with the fit, and since the color is pretty close to a dark denim, I think it will be fairly versatile in my wardrobe! Here’s some more detail shots:

My one detail that I’m not entirely sure I like is the collar. I think that it pressed out fairly well for corduroy that I was afraid of crushing, and I like the shape of the upper collar and the lapel width. I guess I just wish it didn’t have that huge gap where the collar stand is…the brown cord jacket had that same feature, and I’m undecided about whether it just looks weird or not.

I am very satisfied with the interior finishing job! I went ahead and serged all of the lining insides to keep it from fraying and weakening the seams. This is done with a modified bagged lining–I didn’t want to leave the seam between the jacket and the peplum just kind of billowing out, so I used that seam as my handstitching one instead of leaving a gap in a side seam. I used some instructions from a Sew Stylish magazine I had lying around, and they worked brilliantly! So consider that technique checked.

Look how nice and clean that machine-finished sleeve hem looks. (And in this case, I an all in favor of as little hand-sewing as possible!)

Incidentally, I have about a yard of this floral fabric left, so I need to figure out what to do with it. I’m thinking maybe a simple sleeveless top, but I’ll have to figure out what pattern since the Sorbetto doesn’t really suit me, and I’m a little afraid to use the Pendrell again after what happened with the leftover raincoat lining!

On a more positive note, I think the buttons may be one of my favorite things about this jacket. I cannot believe how absolutely perfectly they go with the lining! And though I had to unpick one that got crazy long, I did get some good practice on all-manual all-the-time buttonholes on my machine.

I’ve sort of started my knit dress, though that’s really a technicality. So far, all of my sewing time on it has been spent wasting using the scraps to try and get my serger to make a nice seam. The front looks basically perfect, but the back side isn’t quite working and the seam does tend to pull apart and show the stitches when any pressure is put on a seam. So I basically have to go over it a second time with the regular sewing machine. According to the book I was looking at, I need to tighten the tension on the left-hand needle, because the stitches are pulled too much in the back. But if I do even a little, those stitches just don’t catch at all and it looks worse on both sides. I know it’s not the needle, because I changed it to a fresh one, and I’m pretty sure it’s not the thread this time, since I’ve got my nice sewing machine thread in the needles right now. The other thing is that part of the threading for that particular needle just won’t stay in place, so I’m not sure that doesn’t have something to do with it. I guess my plan of action is to next call the repair/retail shop where I got the darned thing from in the first place, and see what they suggest. (And if I have to get it fixed AGAIN, ugh.)

March in review

Since I’m doing the monthly round-up thing now, figured I’d start the new month off right! So here’s how I did on my goals for March, as stated here….

#1: The Renfrew top–done, great pattern, will definitely use that again sometime.

#2: Finish knitting the Camille shrug–check. And since I had a request from my Onyx sweater partner-in-crime, I did get an action shot of it with the dress at the wedding (this was at the reception, in a side room of the church.) Overall, it worked very well with this dress that I’d originally envisioned it with. (Aside from some fitting issues in the dress bodice itself, which I’m now in the process of resolving since I was apparently too lazy to do it right the first time. Basically, I’m taking in the side seams above the black waistband, stitching it by hand because I have to take apart less of the lining than I would by machine. I need practice on handstitching anyway, right?)

p.s. The sleeves are actually full-length, I just had them pushed up in this picture since it ended up being a bit warmer than I’d anticipated.

#3: Reconstruct that brown suedecloth skirt. Check, although I still need to do something with the lining.

#4: The next step of the Onyx sweater. See previous post for the reason I didn’t finish this. (I have a phone date with my KAL partner tomorrow to see if she can help me figure out what on earth I did wrong.)

#5: Blue corduroy jacket. It’s not quite done, but it’s getting close.

#6: Swatch for my Strafford Tee. I did actually do one earlier this week, and am now debating what to do–according to the swatch, I had about a stitch more per inch than I was supposed to. Which honestly doesn’t seem like a big deal to me, and I might just go with it since I was trying to figure out how to incorporate some more fitting into it anyway. It looks like it’s pretty loose at the waist.  So I guess this confirms that I am a too-tight knitter.Maybe I should just re-knit the swatch and try to relax a bit, since I’m actually using the right yarn for once…

Essentially, though, I got 4 out of 6 done, and the Onyx was pretty much due to circumstances beyond my control. Not too shabby at all!

So here are my goals for this month:

#1: Finish the blue corduroy jacket.

#2: Go through the Jean-ius class that I have from Craftsy. Which will hopefully result in a new, well-fitting pair of jeans!

#3: I’d like to get a quick project in between the jacket and the jeans, since they’re both pretty detail-heavy projects (and that’s been on my mind since reading Tasia’s post last week about how long sewing projects should take.) I’m not entirely sure which one yet, but I’m thinking either Butterick 5606 or a reconstruction project. (I’ve decided to hold off on the knit shirt I already have cut out, since that’s long-sleeved and it’s increasingly unlikely that I’ll get any use out of it in the next several months, by the time I finish. So I may just knock that one out later in the summer when my brain turns to thoughts of preparing for fall.)

#4: Get my Onyx sweater sorted out so I can continue that.

#5: Cast on my Strafford Tee.

#6: Finish putting my fabric swatches in their new notebook.

#7: Make one scrapbook page. Gotta start somewhere if I’m serious about getting myself back into this.

One last note: The patterns have all been claimed. Sarah and Muireann, I’ll get those to you asap.

Just in time….

I finished knitting my Camille shrug on Saturday! Good thing, since I need it for this coming one. I like it, but I realized after trying it on that the cut of it is going to make it a little difficult to wear with anything too strappy. I’d originally planned to wear this dress, but then had decided to switch to a different one that one of my friends passed on to me because I thought that the colors (lavender topped with black tulle) would be a little more spring-like. But this shrug looks pretty awful with the strap placement, so I think it’s going to be back to plan A….just have to dig it out from under my bed where most of my spring/summer clothes are still residing first.

I’m thinking it might stretch out a bit more as I wear it– right now, it’s cutting just below my armpits. I thought about eventually undoing the binding and adding more to the ribbing, but with the way it sits on the back of my neck, I don’t think I want to do that.

And here’s the back in action! (Please ignore the messy hair. And the somewhat dazed look on my face in the previous picture. I’m a bit under the weather today.)

Now here’s the thing I don’t get–how do I always, always drastically overestimate on my yarn? So far, I’ve always bought the yardage that the project calls for, or as close to it as I can get when I’m always subbing yarns. So how is it that I have 3 full skeins of this left over? And what on earth am I going to do with them? (After I finish a few more queued/started projects, anyway… I have the next one in mind and may start swatching tonight.)

I haven’t worked on it since last Wednesday, but here’s a sneak peek of what’s going on with that jacket. Which hopefully I will have more time to work on tomorrow.

Just a reminder–I’m giving away a couple of unused patterns from my stash. I realized belatedly that I was a bit unclear on the procedure in that post, so here’s the deal: I am willing to split them up, it’s first-come first-serve on which ones you want, and the deadline is this coming Sunday. If there aren’t any takers, I’m going to put them up on the local Freecycle, but I wanted to give the lovely online community the first shot! So far, there haven’t been any takers, so they are all still available.

a case of the blues

 First of all, thanks for all of the lovely, encouraging comments on the shrug! The latest update there is that the sleeves are sewed together and it’s back on the needles to knit the last bit of ribbing.

And thanks also for the feedback on the word verification. I did get a gentle reminder from a blog-less friend of mine who regularly comments that not all anonymous commenters are bad (at least the ones who leave a name and a real comment), and have since switched it to no word verification but full comment moderation so I could allow for that sort of anonymous commenting. I’m still a bit concerned that I’ve been getting extra pop-up windows since I initially turned the verification off, and I am still averaging about one spammy comment a day, but at least I can easily mark them as spam and delete them. (Carolyn, to answer your question, what I meant by the pop-up windows is that I’m getting additional open windows when I did not click on anything to bring them up. Usually it’s more annoying, for things like Amazon.com (except I’m not sure it was legitimate, because I certainly did not open a page for baby clothes!), or for a “click here to claim your prize” type thing. I did get a pretty nasty one the other day, though, and so far my virus scans have turned up nothing other than tracking cookies. Gtt.)

Computer issues aside…Now that the shrug is almost complete, my attention is drifting to other knitting projects. Namely this sweater that one of my online friends and I are making as a mini-knitalong. And, as it turns out, I have a lot of new techniques to learn here. So far, it’s been invisible cast-on, and short rows, and that’s just on the first page! (And here I thought this would be easy because basically everything is in knit stitch with no purling!  And, of course, I’ve already had to start this one over once. We’re taking this at a snail’s pace since we both have real life stuff and other projects going on, so even though it represents about 60 rows, and a lot of them are short, it’s a month’s worth of work that I’m trying to redo here. The problem came with said invisible cast-on. When I joined it together and got to the end of the second section we’d decided on, I looked back and realized that oh, wait, this looks wrong. Instead of that nubby garter stitch look, suddenly it had a smooth stockinette look for about 3 rows right around where I did that invisible cast-on. So obviously, I did something wrong.  I attempted to stick the needle in right before that section started and rip back to there, but that didn’t work so well. So I just decided to rip the whole thing out and start over, since those two sections didn’t take me very long in actual knitting time.

And wouldn’t you know, even that part didn’t go well!  I kept ending up with these weird loopy knots like this, where I was having to shove the entire ball of yarn through there just to rip out the next part.

And then I realized that I was supposed to rip it out in the opposite direction that I’d been knitting it in, I was doing it backwards, and that was why it was being so uncooperative. Palm, meet face.

So I’ve got it re-knit up to about 6ish rows before I’m supposed to switch back for knitting from the opposite side of the invisible cast-on. Hopefully it will go better this time, since I tried a different technique for the cast-on in the first place.

I’m having better luck with my blue corduroy jacket, which, oddly enough, is pretty much the exact same color as my yarn. This picture is a little outdated– I meant to write this post a couple of days ago. Since then, I’ve added the sleeves, and stitched the two layers of the peplum together. I took a chance on just going ahead and sewing it together as is, with just a bit of a smaller seam to attach the sleeves to the body, since the brown jacket was so easy to fit and it was also a Burda pattern. My gamble is paying off so far, since it looks like it will work just fine from my couple of times I’ve tried on. A rather fitted jacket, to be sure, but I think it has to be with the peplum. And since this is a rather lightweight corduroy, I’m thinking of this more in terms of a spring/fall layer than winter warmth. (Besides, apparently I’ll have a sweater in exactly the same color, so I can just wear that when I want blue then!) So this is moving along nicely, and I think I’ll quite easily make my goal of finishing it before the end of the month.

The one thing I need to figure out: In the interest of new techniques, I’d like to try bagging the lining somewhat. I think it will be easier than usual, since I had to cut the inner peplum from the lining fabric and therefore I’m planning on just hand-stitching the lining down at that lower seam. So all I’ll have to sort out is the sleeves and sewing the lining to the inner facings. I know I have some resources to figure out how to do that lying around here, so I’ll just have to look into it. I was thinking about trying a bound buttonhole as well, but I think I already screwed up my chances on that by sewing the facing in. Oh well…. I wanted to work on my machine buttonholes more anyway. (The jacket is actually supposed to have snaps to close, but I’ve decided to go with the buttons being functional instead of purely decorative so I can leave the jacket open when I want to. The snaps look kind of funny when I do that, IMO.)

I do have a blog award I recently got that I need to share, but I’ll do that on the next post, since I’d like to actually have some time to sew this afternoon! (There’s also going to be a low-key giveaway, so stay tuned!)

Chop shops and awards and sewalongs, oh my!

Monster post alert!

First up: I got sewing goodies for my birthday!  A rotary cutter, a mat, this pattern to make my own ironing aids, a straight edge for cutting and grainline measuring (all things I tend to borrow from my mom on a regular basis)…and of course, those two pieces of fabric. They’re both knits–the green is a rayon jersey, and the blue is made from hemp! They were given to me to make with this one Butterick pattern I recently picked up for a convertible jersey dress you’re supposed to be able to make 6 ways. All of the solid knits in my stash were a quarter-yard short of the necessary yardage, and I looked at the layout and there was no way around it. (Of course, now that I have fabric, I cannot find the pattern anywhere. How annoying is that?)

In preparation for my impending return to a more regular work schedule, I spent about 5 hours cutting things out in the basement yesterday, and only got through 2 things in my bagged-up pile (plus a super-quickie project to work on while sewing with a friend on Friday). It was just a day where there were lots of delays. Like the first knit top I cut out, I didn’t have quite enough fabric in the piece I’d originally pulled from the stash for it to work with the layout, so I had to swap it out for an entirely different one. And then I had to trace a pattern out of BurdaStyle. Which happened to be for a fully lined jacket. And then I discovered this….

Look at the flaws on this corduroy! I didn’t see it in the store because the piece was pre-cut and folded, and it was only along one selvedge. But there were quite a few of those worn, bleached-looking spots, and that definitely made my layout more complex. I ended up cutting the interior peplum out of the lining instead of the corduroy like it called for (which I’d imagine would probably work better anyway, given the weight difference in the fabrics with pleats, I’ll have to piece together the inside facing, and on the inside collar facing bit, I had to allow one of those spots inside the piece anyway.)

I’m hoping to maybe get one more thing cut out today, possibly 2, so I have a good base for starting back at work and still fitting sewing in. But in the meantime, I have some bloggy business to take care of, so here we go…

First off, I got an award from the lovely Hana at Marmota’s Dress Diaries!

 The award is for blogs that you enjoy that have less than 200 followers (and actually, I was surprised to read on hers how many I do have! I never pay attention to my own stats, truthfully.) So since I’m supposed to pass this on to 5 people, here are my picks (based on what Google sidebars told me about follower numbers):

1. Alessa at Farbenfreude. She always makes such lovely, well-constructed things, and it’s interesting to read the tidbits about her life in Germany. I’m also still completely in awe (and slightly jealous) of her “My Handmade Closet” page, since all of my attempts to construct something similar here have been an epic formatting fail so far.

2. Gail at My Fabrication. She’s one of the most frequent commenters here, which I so appreciate! She’s also great at finding wonderful fabric prints, and putting together a wardrobe that works with her “boho to the boardroom” aesthetic. (Also, her top banner picture of the moment just makes me laugh so much!)

3. Helena at Crafting My Own Style. She puts a lot of thought into making things that will fit and flatter and fill the gaps in her wardrobe, while balancing a life that includes a young kid. (Having lots of friends who have young kids makes me really impressed with anyone who can keep the creativity going while having one of those to take care of!)

4. Juliette at Sewing and Style Den. Her clothes are always so fashion-forward, and she does some great posts about fashion in general, as well as some good reviews of things like Burda magazine patterns.

5. Ginger at Ginger Makes. She’s newer to sewing, but puts together some great stuff! And since she’s also a knitter (as many of my sewing blogger friends seem to be) and has more experience with that, I enjoy seeing what she makes there. Gives newer-knitter me some inspiration!

Second order of business: I’ve decided to take on a new project. I actually found out about this loosely-organized “Check The Technique” sewalong through Alessa and Ginger awhile back, and was definitely pondering it. My recent adventures in jacket tailoring convinced me that I need to sign up for this one, because even though I think I can do a fairly good job on a lot of things, there’s always room for improvement. And with no deadlines or specific projects in mind, I can focus on the sewing techniques that I want to learn. I borrowed the list from Alessa, with a few modifications–vintage sewing isn’t really my thing, so there are a few things on the original list that I don’t really feel a need to learn, like “grading a vintage pattern”. I’d much rather focus on some fitting techniques for modern stuff. Also, there’s several things on here that I’ve played around with before, but I don’t feel like I really know how to do them yet, or it’s been awhile and I’d like a refresher course. So, without further ado, here’s my version of Check That Technique!

Things I just don’t know how to do that I want to learn:

  • Bound Buttonhole (attempted once, but with epic fail results)
  • Facing a shirt or dress (amending this to drafting a facing for that, as I’ve sewn facings quite often!)   
  • Faced hem
  • Scalloped Edge
  • Shirring 
  • Waist stay
  • Making and using a croquis (my addition, and this project is in the works atm….)
  • Making and using a pattern sloper (my addition)
  • Fitting adjustments: FBA (attempted here, but if my last attempt on that pattern was an indication, I failed….and then there was this, so clearly I don’t get it yet), that hip-to-waist thing (my addition)
  • Tailoring stuff: pad-stitching, hair canvas (my addition)
  • Bag-lining a jacket (my addition)

Things I’ve tried before that I want to improve on:  (with links to relevant projects)

  • Boning (haven’t done this one since, oh, before I started my blog)
  • Front Fly (my nemesis!)
  • Blind hem (it just always seems to show, dangit!)
  • Pintucks  (done here, but that was on a knit and I’ve never done it on a woven)
  • Inter-/Underlining a garment (done here, here and here, but I still feel like I need work here)
  • Making bias binding 
  • Welt pockets (because, you know, that)
  • Zipper: hand picked, lapped, invisible (I’ve done all 3 multiple times, but being comfortable with sewing zippers just seems to be that thing that eludes me! I still have to read the directions every time I sew an invisible one, and I’ve done it at least 20 times now!)
  • Getting the tension right on my serger (my addition)
  • Altering a pattern for design details (my addition, and one I’ve done a couple of times, but it only works out about half the time–I’m thinking of this one, which was less than stellar)
  • Regular stitched buttonholes (my addition– the automatic buttonhole sizer on my machine hasn’t worked since I had to replace the buttonhole foot that I broke, and I’ve been having trouble getting them consistent since.)
  • Seam Finishes: Bound, Faced (not even sure what this is!), Flat-felled
  • Sew Leather (or faux leather) (since the last time I tried was a disaster)
  • Sew Jeans (which I’m hoping the Craftsy class I got for my birthday will help with)
  • Ruching (because I kind of feel like I should get it looking better in the front than this or this)
  • Installing eyelets and rivets (my addition, because of this headache)
  • hemming sheer fabrics (my addition, and one example)
  • Adding a lining when it doesn’t call for one (my addition, since it always seems to complicate things. Like here. And here. And especially here.)
  • Sleeve vents (hopefully easier than this, the next time)
  • Fabric Dyeing, since it seems to be a hit-or-miss thing for me so far.

Been there, done that, got the shirt. (Or dress. Or skirt. Or whatever.)
(Note: I’m not saying there isn’t room to improve, just that I’m fairly confident in my ability to execute these well!)

  • Lining a dress (check, check and check)
  • Making a belt (check)
  • Making a fabric covered button (check)
  • Pockets: patch pockets (check), inset pockets (check)
  • Piping (check and check)
  • Finishes: Hong-Kong (check and check), Mock Flat-felled (check with waterproofing!), Serged (check on lots of things, but let’s use this as an example)
  • Sew pants (after last summer, I’m feeling much better about these!)
  • Sewing a shirt: collar & collar stand, (check) cuffs (check), placket (also check, though this technique does need some work)
  • Rolled hem (check)
  • Raglan Sleeve (check and check), kimono sleeve (check, even though I altered it later for practicality reasons)
  • Collar: mandarin collar (check and check), notched collar (check)
  • Matching fabric (stripes, or more stripes, or plaids-check)

Thank you for bearing with me during this super-long post, and have a lovely, creativity-filled day!

A very browncoat weekend

I have to admit that I was getting a little frustrated last week over being two months into the year and having virtually no finished projects to show for it. (At least, not finished projects that I actually got to keep, other than that one reconstruction.) But it’s ok, because I finished two things over the weekend. And yes, they are both of my brown coats!

First off, the raincoat is now 100% finished. I got my Fashionable Stitch order of replacement eyelets in last week, and hammered them into the belt on Friday, just in time for heading out on the town on a somewhat rainy night. I did my best to get an action shot, since I’d already gotten the main detail pictures, but due to the rather useless clutch purse that I could barely even fit my phone and wallet into, all I had was my flash-less phone. But here’s my attempt anyway, and my apologies for the blurriness. And the darkness. And the fact that you can’t even really see the belt. But I promise you that I’m wearing it! The verdict: it’s not quite as warm as I’d hoped, but it’s still most certainly warmer than my store-bought raincoat that I use in the spring and summer months. So I guess mission accomplished?

I also finished my corduroy jacket over the weekend. It took me some time to figure out the vents in the sleeves, but with a great deal of help from Sigrid’s tutorial, I finally managed to fudge my way through it. Not the best job ever, but hey, couture hand sewing! (It’s there, buried among the interfacing and the frayed edge.)

Today’s my birthday, and I really like to have something new and me-made to wear for that whenever possible. So I basically spent all day yesterday frantically sewing to try to get this done– about 5 hours on the machine to get the lining/facings sewn together and into the jacket, and then another 4 hours hand-sewing the lower hem and the lining and all of the buttons while watching movies with my (very patient) boyfriend. But I finished it! I’ve already worn this two ways–jeans and my new Princess Bride t-shirt for low-key hanging out with my family this afternoon, and paired with tights, boots and this dress for church this morning. (Because, as I put it on Facebook this morning, it’s my party and I’ll wear tropical prints in February if I want to!)

I’m really happy with how this jacket turned out. The fit is great, it’s super-comfortable, and the style details remind me a lot of this other brown corduroy jacket that I had and loved in high school, which was a vintage lighter brown one from the 70s that my mom had sewn for herself. It was a bit too small across the back for me and too short in the sleeves, so I eventually let it go, but the wide collar and patch pockets on this one bring it to mind. I think that the basted fitting method worked really well for this, since the fabric was tough enough to take it, so I’m not sorry that I didn’t make a muslin.

The lining combined with the dark chocolate exterior still reminds me of the packaging for Junior Mints, though!

Don’t you think?

One last note, since several of you commented on my last post about how organized I’m being with the bagged-up projects. Thank you, but this is actually rather unusual for me– I’m generally not a very organized person at all! I’m usually the person who cuts something out and then realizes when I get to that step that I forgot to cut out my interfacing yet again or that I don’t have a zipper or that I forgot to make sure I have the right color of thread or whatever. But I’m trying to plan ahead this time, especially knowing that my sewing time is going to be pretty limited over the next couple of months. I doubt I’ll get any sewing in tomorrow since I’ll have to work and all, but I’m hoping that they won’t need me to come in on Tuesday– all of my students that day have cancelled this week for one reason or another, so that leaves me with basically an entire free day. So I’m hoping to be able to spend it tracing out a couple of things and cutting out several of those projects so they’re all ready to go!

jacket progress

First off, thanks for the kind words on my last post, Mary and Gwen!

I’ve been making some nice progress on my jacket over the last several days, though slowly because I basically had no time to sew at all over the weekend. So here’s what’s been happening so far:

I basted the jacket together to check for the fit– I cut the size 40 out of the Burda magazine, but with 1″ seam allowances instead of the 5/8″ it called for. And look how much I still had to take it in! (Every line that’s further to the right.) The only place where I think I might need to adjust a little more is adding a teensy bit more room under the arms, but with the extra-wide seam allowances, that will be simple enough. Doing it this way made it really easy to sew for real, too– after I traced the new stitching lines onto my pattern pieces, I just sewed right over the basting lines, so nothing will get lost in translation.

My goal for today was to get the pockets taken care of, and I succeeded. So I did a little process photography– I was afraid that the Burda directions would be typically tough to follow, but this wasn’t bad at all!
First I had to press the pleats in and baste it…

Then sew the bands on the top. (The only problem I ran into here was that I should have checked to make sure the nap was going the same way, because I didn’t and I didn’t notice until the pockets were already sewed on. So let’s just say this was a design detail that I did on purpose, even though it was really just me thinking that the interfacing would probably be better on the outer side.)

Next step was to sew the lining to the other side of the band, with a gap for turning, then to sew all around the outer edge of the pocket.

And this is what I ended up with–it made a pretty nice clean finished edge, and I had no trouble with the lining peeking through when I sewed the patch pockets onto the jacket!

On a random note, this lining fabric is reminding me of Junior Mints.

And here’s the pocket on the jacket–it’s a little off-grain with the corduroy, because of the flare in the jacket, but it is parallel to the bottom edge and I think that was more important here.

The other project I’ve done over the last several days was to package up some projects for the next few months. I still need to cut things out, and trace out about 3 patterns from the Burda magazines and Sewing Handbook, but this is about a dozen projects’ worth of fabric packaged up with the patterns, any thread or notions I need (minus interfacing, since that will come with cutting out.) Since I’m starting to get work at the retail job already, at least I did yesterday, my plan is to cut out several of these all at once after I finish the jacket. And then I can just sit down and sew them whenever I have the time, in whatever order I want to do these in. I’ll most likely tackle the ones outside of the bin first, though I have to trace one of those patterns and double-check my jeans muslin to see if I need to make any more fitting tweaks. I think this should make it fairly easy to work in some mending projects and refashioning as I go on this, too!

A little progress, at least…

This was the first day I was able to work on the raincoat since the last post. Though I did get some knitting in, and one of those patterns traced out. (And I may have ordered a couple of patterns….Ahem.) So here’s what’s new:

I have buttonholes in the pocket flaps, and the yoke. (Decided to go diagonal on the yoke, just to mix it up. Also, I miss the automatic buttonhole sizing capability that my machine used to have before I broke the original foot….sigh.)

I did a lot of internal seam finishing, because look how much this stuff frays! So between that and not being able to actually use pins for fear of poking more holes into it, this is taking a rather long time. The other reason it took a little longer than I thought it would was because I was having a little trouble with one of the pockets….first time I made it inside out and the second time I sewed it in upside down!

But this is what the outside looks like now (photo lightened quite a bit since it’s the only way to see the details.) The front pieces are sewed together, the pockets are in, and the fronts and back are now sewed together at the sides. The waterproofing is drying now, at least as far as I could get it on….I kind of ran out, and since I’d already used and frozen twice, the brush wasn’t working so well and I’m not sure the seams are sufficiently coated. So I ordered two more tubes tonight, to be on the safe side, and I’ll probably re-coat those once it’s in. In the meantime, I can at least sew one seam on each sleeve, and start working on the belt and loops and stuff. Maybe the lining, if I can figure out the best way to sew that together and still get it in the jacket well…. I’m still not sure if I should leave a gap in the back, or just do the hems by hand or what.