
This summer has felt a little weird for sewing to me. It’s not that I’ve lost my sewjo, but I seem to keep running into stretches where I just can’t do anything at either of my sewing locations and it’s taking forever to get anything done. Also, since I do most of my cutting out at my mom’s sewing room due to lack of space/kid-free time around the pointy things, I’ve been also running into situations where I finish a project at home and don’t have another project cut out and ready to start here yet. The good thing about that is that I’m finally getting back into some more refashioning as a result. 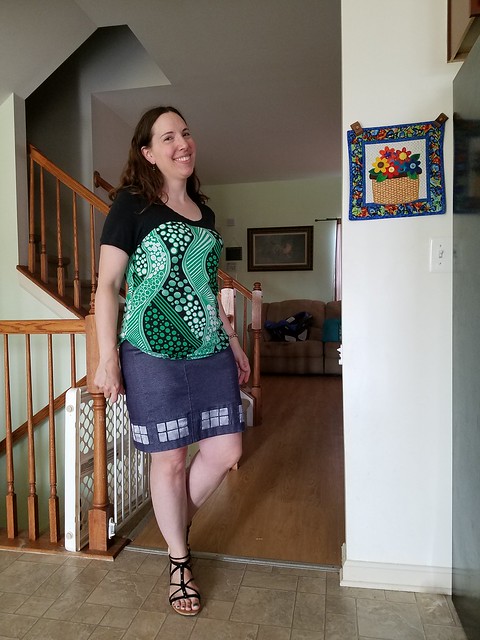
I finished this tee a month or so ago, a self-drafted mashup of the complete fail that was last summer’s Sewaholic Renfrew nursing tee hack, plus the yardish of not-that-stretchy jersey left over from a Cake Hummingbird tee that I had to ditch pretty much immediately post-partum, because my waist will never be that small again. (I should retrace and sew that one again
sometime, though.)
Making this tee was a pretty quick process. I didn’t really take any pictures while I was doing it, since I was trying to knock it out in one evening where I only had to worry about one kid for the night. (It was Hobbit’s birthday weekend, so he and my husband had a little overnight camping trip at his parents’ house, while I went home with Padawan because we didn’t want him anywhere near campfires or tent entrances in a backyard with a pool.) So the process was more or less the following:
- Put on the black tee and hold a tape measure around my chest where I thought the seam should go. (This was after a previous session of goofing around with the fabric and holding it in different places with the tee on to see where it would suit best.)
- Chalk the line in the front.
- Lay the tee flat on my cutting mat and cut through both layers at the line plus seam allowance. This resulted in a mildly curved cut line.
- Lay the fabric out, folded double, and trace that cut line from the tee directly onto the fabric, then trace out a flared sort of shape for the body of the tee.
- After I sewed the seams for the bodice and sides, I tried it on and decided a curved hem would be best. So I trimmed that and hemmed it on the coverstitch. And done!
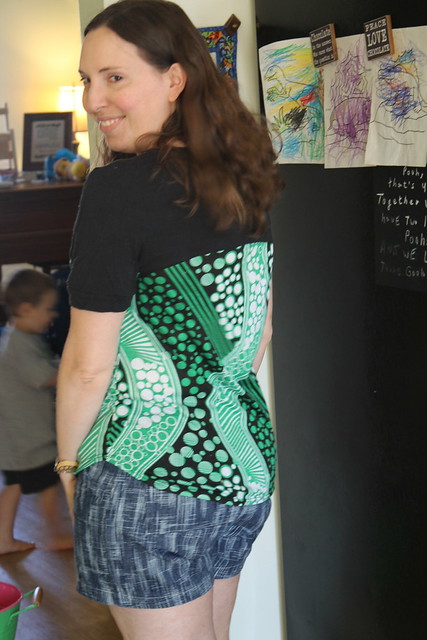
Overall, I think I like it. This usage definitely showcases the print better than the project it was left over from, I think. And somehow, in the course of my weight shift and subsequent closet purges, everything I owned in this kelly green type color left my closet, even though I still love green. So I’m glad to have some back! I can’t honestly say that I’ve been wearing it a ton this summer, though, because I’m also in this weird wardrobe place where my remaining separates just don’t seem to be going together, and I’ve been struggling to put outfits together all summer as a result. (Thus the two different bottoms in these photos where both are not-quite-solid denim.) That’s something I’m definitely going to have to work on remedying for the next warm season, though I’ve been feeling like it’s a bit too late for this year. (I’m currently wrapping up some needed summer pajamas, and then I’ll have to start thinking fall.) But I am hoping that this tee might see a little more use when jeans season rolls around again.
