An actual finished sewing project–imagine that!

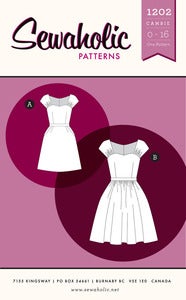
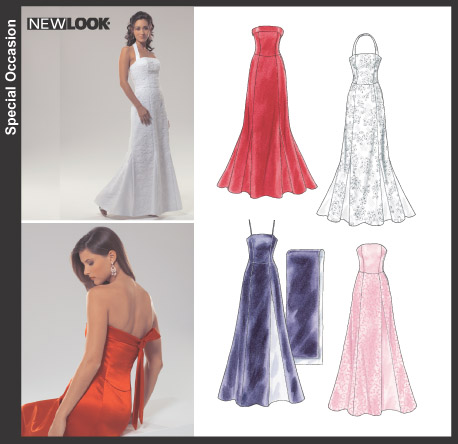
Yes, my friends, it hasn’t been all wedding planning here….yet. I’m allowing myself the rest of the summer to wrap up as many in-progress things as I can before tackling The Dress, since I can’t do much anyway before I settle on some patterns. I did order a bunch of swatches, though, since only having Joann’s around + wanting to avoid a polyester dress if at all possible = can’t shop locally.

Surprising realization of the week #1: I never shopped much from Mood, because I thought they were super-expensive on everything. Which they can be. But for things like silk shantung, they are surprisingly affordable. At least compared to most of the other places I looked.

Surprising realization of the week #2: It is shockingly hard to find just plain white silk fabric. Everything is off-white, or ivory, or bone. Given that a lot of wedding dresses are white, you’d think it would be easier!! (Side note: I’d happily go with ivory, if my lace wasn’t obviously white. It looks weird if I layer that over ivory–I tried it on the Dharma Trading Co. swatches.)

But enough of that. The point of this post is that I actually finished sewing one thing. So it’s pattern review time.

Pattern: McCall’s 6031 (Side note: seems I can never get a pattern review up here before it goes on clearance/out of print!)

Description: Knit top with elastic empire waist, self-faced bodice & cap sleeves, and cowl neckline.

Pattern sizing: 4-12. I made the 12, and was wondering the whole time if I should have bought the next pattern size up, but it turned out fine.

Did it look like the photo/drawing on the pattern envelope once you were done sewing with it? Yes

Were the instructions easy to follow? Yes, except for the part where I thought I was being all smart about coming up with a better way to get the cowl neck in, since I was partially constructing on the serger, only to find that I’d backed myself into a corner for the cap sleeve insertion. I’m not entirely sorry I did it this way, because the serging on the cowl would have been all exposed and probably not so great-looking if I’d followed the instructions. But it really did make putting the sleeves in much, much harder!

What did you particularly like or dislike about the pattern? While elastic often isn’t my favorite treatment, in this top it’s comfortable and makes it easy to get the empire waist fitted without putting too much strain on the stitching when I pull it on. I do wish the cowl had been drafted a bit differently–perhaps with more flare towards the outer edge. It’s hard to keep the seam line from being exposed when I wear it, and I’d prefer it to cover. (See picture.)


Fabric used: A hemp rayon from Fabric.com, which was the second piece of fabric I was gifted for my birthday this past year to make this dress. Unfortunately, the selvedges must have been off when it was being cut, because once I got that lying flat, it was so crooked on the edges that I lost that extra 1/4 yard that I would have needed to make that particular pattern. 

It’s very comfortable to wear, but I am a little concerned about the color durability–I finished this up on Tuesday and wore it for the first time this past Thursday to go see a minor league baseball game with a bunch of friends. (More so for the social time than to watch the game, since I’ve never particularly been a fan of baseball. It bores me.) The game got called about halfway through the third inning because this massive thunderstorm rolled into the area. So after nearly an hour of waiting it out under the awning and realizing it wasn’t going to let up, we decided to go to a nearby brewery/restaurant instead, which is where my fiance kindly took that top picture for me. It was also there that I discovered that where my shirt had gotten wet during the mad dash to the car, there were actually lighter spots. Which is what concerns me, because usually fabric gets darker when it’s wet, you know? It’s hard to tell in the current lighting, since it’s rather overcast, but it looks like the blotchiness where it got wet hasn’t entirely gone away, either. I’m also confused, because it’s not like I didn’t prewash it! I’m hoping it’s not too terribly noticeable, or that it won’t get worse with continued wear.

Please excuse the wrinkles, need to wash

Pattern alterations or any design changes you made: Aside from the aforementioned cowl/sleeve thing, I did change the seam allowance between the bodice and the elastic casing to 1/4″, as a sort of last-minute cheater’s FBA. Everything seems to be sitting where it’s supposed to, so I guess it worked out this time.

Would you sew it again? Would you recommend it to others? Maybe I’d sew the view with the pleated neckline. I like the design of this particular view, so I’d possibly sew it again as a print, but with an altered cowl neckline. But I wouldn’t sew the other views with the front gathering, because I don’t think that’s a particularly flattering look on me. The one exception might be waaaaaaaay down the road here if I had to think about maternity wear. (One of the odd things about being engaged– now I have to consider that possibility in a few years!) As for recommending, it’s kind of a moot point since McCall’s is clearing this pattern out anyway, but it could be a good look for a teenager or someone in their 20s. And hopefully early 30s, since that’s where I’m at.

One final note about this top: I’m calling it my Engagement Shirt, because even though I didn’t finish it that day, I did start sewing it together on the day I got engaged! 

I got some other things done on Tuesday, too, since it’s getting to the slower part of the year at my retail job and I got that day randomly off, other than the couple of lessons I had to teach later. Since most of my weekend time lately has been lost to social commitments and early-stage wedding planning, is it bad that I’m hoping I keep getting these random weekdays off to sew?

Dress Design Details, or, the planning continues.

I have actually been doing some work on small projects– my wrists have healed enough that I can knit again, as long as I give myself breaks every hour or so (thank God!) And I do have a hand-sewn accessory project that I started back at the end of Me-Made-May, and is now in its final stage. But since the knit shirt just looks like a slightly longer tube than it did the last time I took a picture of it, and the other project is close enough to done that I’d rather wait and take a picture when it actually IS done, here’s more wedding dress pondering for you instead!

I’ve been doing my research, reading Bridal Couture and driving all of my Pinterest followers crazy by posting swatch after swatch of various white silk-type fabrics so I can compare prices. I also spent some time the other night digging through my pattern stash in order to see what helpful things I might already have on hand. (Those years of DIYing recital dresses came in handy, as I have more formal patterns than I probably should!)
Image of 1202 Cambie Dress
As a reminder, my plan is to base the bodice off of the Cambie dress. I did discover that the skirt, as is, will probably not work lengthened, because the gathered piece is basically one giant rectangle. Good for this dress and elastic-waist maxi skirts (a la Day 24), not so much for a quasi-formal dress where I’d want a little more shaping. But I did find several possibilities for the skirt already in my stash.

Bustier top and skirt sewing pattern McCalls 3853 Size 6 to 12

Option #1: McCall’s 3853. I used bodice B (the pink one) of this for the 2-piece dress I made for my masters’ degree recital. I’m thinking the skirt that’s with that same bodice on the pattern.

Pros: I’m sure it would look good with the Cambie bodice, since it’s essentially the same skirt but longer. Estimating the yardage is simple, since these are all 2-piece gowns, and that particular skirt does have the sheer overskirt that I’m very strongly considering. Also, it has a centered zipper, so it would be quite simple to adapt to the pattern.

Cons: With that overskirt, we’re talking 13 yards of fabric for the skirt alone! Also, I’m not entirely sure how flattering that much gathering at my waist will be, especially since this will be a straight-across cut with an exposed waistband rather than the overlapping bodice.

picture

Option #2: McCall’s 3315. I paired this skirt with the bodice above for that same degree recital dress.

Pros: Mainly, I’ve made this skirt before, even though that was several years ago and the process was kind of lost in the haze of practicing/classes/TA’ing/work. It’s also a separate skirt/bodice, and the pleats would probably be a little more flattering at the waist than the gathering.

Cons: Though I’m not sure how flattering, with that straight across vs/overlap bodice thing again. Also, it’s still a LOT of fabric (over 6 yards just for the skirt), and if I want to incorporate any of my lace into the skirt, it would be overkill.
Option #3: #124 from the 3/07 issue of BurdaStyle (easily the best issue I ever bought, given that I’ve already made 2 things from it!)
Pros: MUCH less fabric yardage = saving some money! The pleats seem to be stitched down to a point, so given that it’s already straight across at the waist, this would probably be the most flattering out of the 3. Also, it includes instructions for a petticoat of sorts, which would help with the fullness. (Though I’m not sure I want to make a separate skirt to wear under my skirt, you know? I’d rather just build it all in together. But that doesn’t mean I can’t figure that part out.)
Cons: The major one is that this is a side-zipped dress. So with the Cambie bodice, I’d have to redraft the back to make a center seam, and I’m not sure what that would do to the pleat.

A fourth option I’m considering, though I don’t have any good patterns on hand for this, is a simpler A-line type skirt with a chiffon overskirt that’s split up the center front–kind of a subtle Renaissance or Regency-type effect, and it might be a nice nod to a train without actually having to bother with one. I’d just have to find or figure out a pattern that would allow enough fullness in the hem that I can comfortably walk in it. I tend to take pretty big steps, and I’m sure the heels won’t help.

(Yes, that’s right, I already have my shoes– I’m recycling the pair I bought to be a bridesmaid for one of my bridesmaids! I’m still shorter than my fiance in them, they fit decently, and I hate trying to find formal shoes that fit my extra-wide feet, so I’m just going to find some shiny nail polish to touch them up with and be done with it! So now I just need to figure out the bra issue and all of my accessories that affect fit will be in place.)

The other issue that I’m STILL trying to sort out is what, exactly, to do with the back. Here’s my thoughts so far:

Option #1: Just use the back of the Cambie, with lace on top and whatever fabric I use underneath for the front partway down.
Pros: Pattern-wise, it’s the easiest option, other than drafting a partial back to go under the lace. The cap sleeves are more or less guaranteed to work. And it would be a good way to really showcase the sunflower lace, since the detail will almost certainly be lost when layered over another fabric, unless people are looking closely.  Also, I wouldn’t need to buy another pattern since I already have it.
Cons: I’ll have to figure out whether I’d be better off splitting the top pattern-wise. I already know that, unless I underline that entire section with skin-toned organza, there is no way a zipper is going to go all the way up. That lace is way too flimsy for that. I’m not sure I want things that closed-up in back, since that’s mostly what people are going to be seeing throughout the ceremony. (Though going with the lace on top would open things up some visually.) Also, I’m not sure at all yet what I’m doing with my hair that day, and my hair is long enough that if I even leave it half-down, all of that lace detail would get covered up anyway.

For any of these other options, I’d have to buy patterns.

V8729 Option #2: Vogue 8729. 
Pros: I like the V in the back, but it’s not so deep that I’d have to worry about even a low-cut long backless bra showing. Also, that skirt could potentially work as a 5th pattern option, if I don’t mind that really 50s-ish silhouette. It would work really well with the ring, but dress-wise, I’m not so sure that’s me…

Cons: I think I’m going to have to drop the back lacing idea if I want to go with making the pre-existing waistband of the Cambie green, and that would be the easiest way to incorporate a color into my dress. (Not that the giant butt bow would be happening anyway– I’d turn those into spaghetti straps like that one inspiration dress!) But the more I’m thinking about it, the more I’m wondering if that green waistband plus back lacing plus lace covering the bodice would be overkill. Also, I’m not sure how well the cap sleeve front will meld with that back strap.

V1190Option #3: Vogue 1190
Pros: Those wider straps would be much easier to meld with the cap sleeve front, and the V-neck treatment with them is kind of interesting! Redrafting the back shouldn’t be too much of an issue either.

Cons: Though from all that I’ve been reading, the dress should be supported by the waist and not the shoulders, I still feel like I’d have to reinforce those straps quite a bit with the weight of a wedding dress skirt pulling them down. I’m also having a bit of trouble visualizing the look to decide if I’d really like the cut, when it came down to it. 

V2960Option #4: Vogue 2960
Pros: It’s already a cap sleeve, so next to the Cambie, this would probably be the second-easiest option to tweak. And I like the scoop in the back.

Cons: Given that I’m strongly beginning to suspect that I have that swayback issue, it could be rather challenging to avoid a gap right at the back there. The straps are also narrow enough on the side back that I’d also be a little more concerned about the dress staying on my shoulders with that low of a scoop and the skirt weight.

So there you have it….there’s still a lot to think about! You’ve all been very kind and encouraging so far in the comments, and I’ve seen several good suggestions, so I’d be interested to hear what all of you brilliant, creative people think!

Edit: I have to apologize– I think the commenter’s name was Alexandra. I meant to hit publish and accidentally hit delete instead. (That’s what I get for trying to moderate before I finish my morning tea.) To answer your question, the main thing I’m wondering about regarding a side zipper with the Burda skirt is the fit–the sides of my waist going into my hips  are much curvier than my back (even if I do have a swayback), and I am concerned about strain on the zipper with that sort of shaping. I am planning on building a waist stay into this, but I’m not sure if it’ll be sufficient to prevent the zipper popping open in the middle.

Edit #2: I was just poking around a bit on various pattern websites, and the skirt of this is intriguing me….
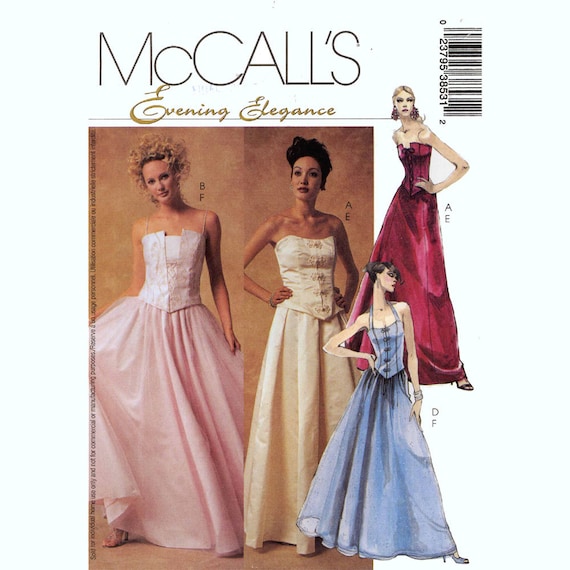
I’m looking specifically at that blue sketch, and wondering how it would look to have a pop of the green (maybe overlaid with the lace) in that contrast bit…
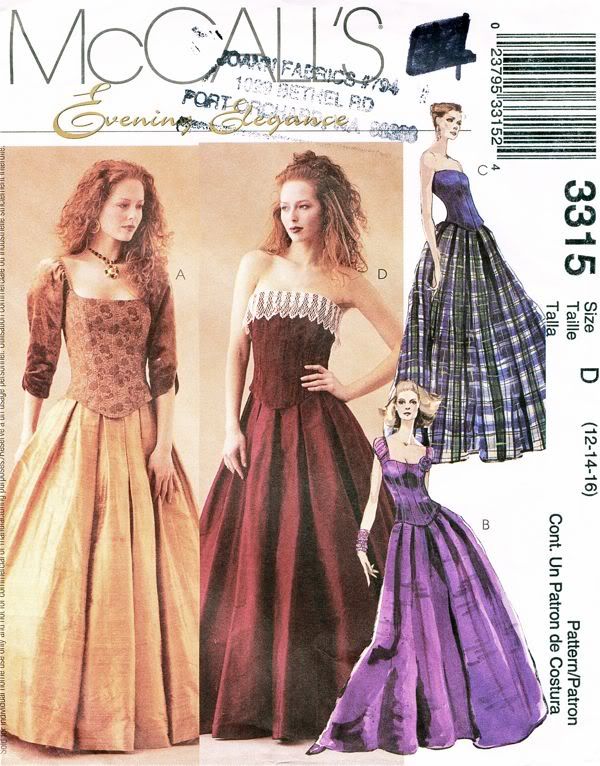

Making plans…

(Dear Doug: Spoilers.) 

Just had to make a note for my fiance–he’s been extremely supportive of my sewing and such, and has admitted to reading this on occasion to get a better understanding of why I enjoy it so much. (That, and there’s often pictures of me on here.) He knows I’m sewing The Dress, so I’ve warned him to read at his own risk. Anyway.

Thanks for all of the congratulations and encouraging comments on the last post! I know this is going to be the biggest undertaking yet. Though I don’t think it’s quite as crazy for me as it sounds. I’ve sewed formalwear before. Including the dress for my senior prom (while taking a full credit load of honors and AP classes, working a part-time job, being involved in youth group, and normal teenage social life stuff), and the dress for my masters’ degree recital (while being a full-time grad student and a TA, getting my first real batch of students outside of the university setting and still having several through the community music school there, and practicing for hours a day). So surely I can handle sewing a wedding dress when I have almost a year to do it, right? Gail in particular requested to hear what my plans are, and I was planning on posting this soon anyway! (Sorry to hear about your ring, by the way…. I hope you get it back, somehow!) So I figured I’d kick off the first in what I’m sure will be many, many posts on this particular subject with what’s inspiring me and what my plans are at the moment.

I have to admit that I wasn’t entirely in the dark that this would be coming. Doug (my fiance) had dropped some pretty strong hints that he’d be asking me sometime before the end of this year. So naturally, I’ve been pinning interesting-looking dresses on Pinterest for awhile now, in moderation. I was never one of those girls who has been planning my wedding since I was 5, especially since I spent most of my 20s questioning whether I’d ever get to have one, but there was 3 things that I always knew about The Dress:

  1. I wanted to make it myself. (Especially after having worked on one up-close and personal for one of my friends, and being rather unimpressed with the quality of materials and construction that they got for the money.)
  2. I don’t want strapless. (Which eliminates about 80% of the dresses on the market right there.) I don’t think that straight-across cut is the most flattering on me, and I do fear the wardrobe malfunction!
  3. I don’t want a train. (Which eliminates probably 95% of the dresses that would be left after the strapless cut.) I’m clumsy enough that I’d probably trip on it on my way to the aisle, and frankly, I hate the idea of the bustle. (My backside doesn’t need to look any bigger, thankyouverymuch.)
Source: oncewed.com via Becky on Pinterest

I was thinking at first that something along the lines of this might be neat. I liked all of those criss-crossy bits, and the ruffly-but-not-frou-frou skirt. And I know it cuts straight across, but straps can always be added to detract from that. But that would be really difficult to figure out the pattern for–lots of draping of little strips of chiffon or something, and probably not the easiest thing to do on myself. So it obviously would have had to be a toned-down version.

Two things changed my plan. The first was that I found this on Etsy:

I’m not much of a lace girl, usually. But the 4th and only other thing I knew long ago that I’d want in my wedding was sunflowers! I justified buying this by telling myself I could always be on-trend and make a lace top for myself, but I do have to admit that the thought of a wedding dress was kind of in the back of my mind. So I have 3 yards of this stuff, all washed up and ready to go.
The second was Sewaholic’s Cambie dress. As soon as I saw that, I knew that the bodice cut and especially the cap sleeves would be the perfect way to use this lace. I’m thinking an overlay on the bodice and by itself on the caps. And a border around the hem, if I can swing it.  So tell me–is this not the long wedding version of the Cambie?

Thought so.

I am planning on changing some things in the pattern. The length, obviously, since I’m traditional enough to want a long dress. And I think I’m going to do some big box pleats in the skirt instead of the gathering. Once I factor in any structural aids like boning, and underlining and lining the skirt, I’m not going to want that much gathered in around my waist, so I’d like it to be sleeker. Either that, or just a smooth A-line, though I’m leaning more towards the pleats since it would add some skirt fullness. I take big steps when I walk, so ease of movement would be good.

I’m also very strongly considering adding some color into my dress–with this design, most likely as the waistband. (And possibly fun with lining.) We’re doing green as one of our wedding colors, since it’s his favorite. And if you’ve been around this blog for any length of time and seen my usual fabric palettes…well, you can probably guess that green is one of my favorites too. Doug also requested that I make him a tie for the wedding day, so I think it would be kind of cute to use the same fabric for his tie and my whatever color bit.

Where I’m a little stuck so far is what, exactly, to do with the back. I’ve long liked the corset-laced look, and that would have a definite fitting advantage since I could just keep it a little looser if needed, or (more likely scenario) if I’m so stressed out from all of the last-minute details of wedding planning and getting ready to move and whatever is going on at work that I’m too nauseous to eat half the time, I can just tighten it up more. So maybe something like this… 

But, you know, with the cap sleeves extended down and the corset would end higher and there might be green at the waist. And no train. (But hey, it’s got the pleats!) I do have one pattern already that would help me to get that look with the Cambie bodice front, with some modifications.

I love the modernized corset-look of this one:  
And I did find a pattern that’s very similar. Minus that big butt bow, which again, I don’t need. The main thing I’m not sure about with that one is how to handle the cap sleeve back. There would pretty much have to be a lot of redrafting. 

I have been playing around with my croquis a bit to try and refine my ideas, and to play around with different skirt options and the straight across vs. sweetheart neckline. So the silhouette I’m leaning most towards is the one to the left, with the original bodice and the pleated skirt.

The back is still the tricky part. My sketching skills don’t make the middle look that great, but I do still like the openness of it. But I suspect that the pattern will be easier to modify and manipulate if I do the one all the way to the left with the more straight-across back. (Minus, you know, building in a corset. On the plus side, that would be a lot easier to build structure into than a dress with an additional slant for a v-neck back.)

So that’s where I’m at so far. If I can manage to get the Vogue pattern on sale, I seriously might just play with two bodice muslins and see which one I like better when it’s on.

In the meantime, while I ponder these design choices, I have some reading and research to do.


The best kind of distraction

So I wanted a quick sewing project after the Summer Spark Sewalong before I dive back into the jeans, and so early last week I cut out a knit shirt. I started sewing it together on the morning of the 4th. And I haven’t touched it since.

The reason: this is what happened early in the evening of the 4th.

Needless to say, I’ve been a little distracted since.

I do plan to get back to my sewing soon, and hopefully my knitting if my carpal tunnel eases up soon– I have a few unfinished projects that I’d like to take care of (like said shirt, and I really would like to get those jeans made up, because I’m going to need some comfortable jeans to wear for planning this thing.) Besides, I need something to keep my hands busy while I solidify some ideas that are bouncing around my head. That’s right… I’m going to be taking on the Ultimate “Frosting” Project: my wedding dress!

Summer Spark Sew-along, finished!

I finished sewing together my Lonsdale dress on Friday, but haven’t had time to blog about it until now. I’ve also been a little quieter than usual with the in-progress stuff, because my carpal tunnel has been acting up for the last couple of weeks–the worst flare-up I’ve had in years. So I’ve been having to be a lot more careful about time spent on the computer, as well as more or less completely taking a break from certain activities. Sadly, knitting is one of those, but they’re starting to feel a little better. So I’m hoping that as long as I don’t overdo it in the next few days, I can start doing that again soon. Anyway, here’s the finished dress.

Lonsdale FrontThe front. I probably could have done a better job of matching the prints, had I had more fabric. As it was, I could barely squeeze all of the pieces onto what I had.

Lonsdale BackAnd the back, with its halter ties that I made in place of the bow in the back.

(p.s. dear boyfriend that I know likes to stalk this blog to see pictures of me….you should probably stop reading here, ok?)

Aside from the fitting, the most time-consuming part of this for me was putting the lining together, since I basically built a corset-of-sorts into it. So I thought I’d show some of that process, too. Rather than try to come up with the padding and shaping myself, I decided to cannibalize a bra that I already had. The underwires were still good, and the cups were in fairly decent shape, but it was just getting a little worn and to the point where it would be hard to wear under knit shirts without the edges showing some. This was about halfway through the process of sewing this in–I hand-stitched the facing seams over the cups to help hold them in place.

Once that was done and all of the boning was in, this is what it looked like. I basically tried the lining on while wearing the bra and pinned it into place to figure out where that should go, and also to mark where under the cups the boning should go. Aside from that bit, adding the boning in was pretty easy.

And this is what it looks like on the inside of the dress. I know it could probably lay flatter on the center front, but this was honestly the best I could work it with the underwires, after some time spent fiddling with it. I do think I did a pretty good job of re-lining the cups with the cotton sateen that I was using for the lining, though. (Incidentally, the same cotton sateen that I used to line the “In the Jungle” dress, which my mom gave me for free, and I still have some of it left! 

In retrospect, I probably should have allowed a little more ease in fitting to make up for the extra layer with the boning. Though it was better once I trimmed down the seam allowances in the waistband. The boning does seem to make the fabric protrude a bit funny right above the waistband, and I’m not sure why yet or how to fix it. But I think I can at least check this technique off. I did also attempt to do a blind hem on my machine, but it was NOT cooperating. The tension was all wonky on the hem stitches, and the thread marks were way too obvious. Which may have something to do with it being a print, but I’m not sure. And since this was June 29 and I wanted to get it done by the end of the month, I finally decided to just do a regular machine-stitched hem.

Overall, I liked the pace of this sewalong! And I feel good about actually meeting the objective, rather than scrambling to get 3 things done when I really only had time for one, like with the Colette Palette challenge. So now it’s on to the next thing–more jeans-fitting, once I actually order that waxed tracing paper, and I’m starting to cut out a knit top. There may be a Thurlow trouser (or shorts) in my near future, too….