cuteness overload

I have a tolerance-hate relationship with shoes. I tolerate them, because my feet would be cold without them, and I’d step on a lot more sharp, pointy things. (Especially with this hobby.) But I really hate shopping for them, because it’s so hard to find shoes that fit and are still cute. I’ve wished SO many times that I could just make my own. And one of the things parents typically do with their kids is vicariously enjoy the things they could never do themselves, right? So all that to say, I made my kid shoes. And they’re adorable!

I had a cooperative model today. So prepare for a barrage of cuteness!
IMG_2729
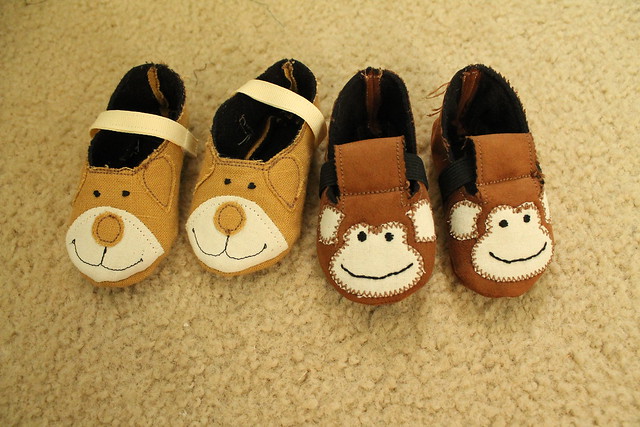
First of all, the shoes themselves. Both are from Simplicity 2491, with a few modifications. Everything is scraps–linen, heavyweight muslin, a thin faux suede, and microfleece for the insides. The pattern called for wool felt inside, but I didn’t want to risk finding out the hard way that his skin reacts to wool as badly as mine.

IMG_2727
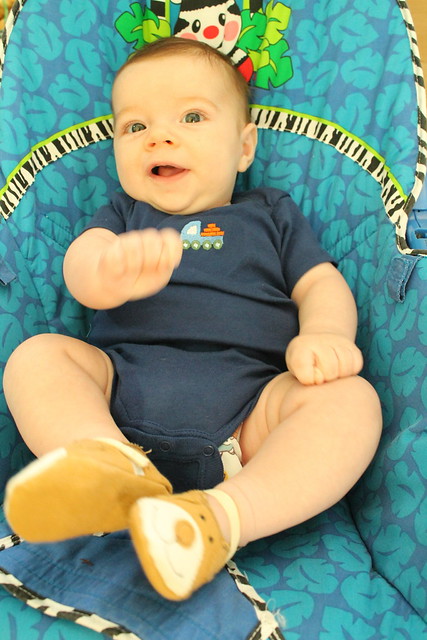
The pattern for this one looked kind of like a bear,  so I altered the shape of the ears so it would resemble our golden retrievers. I also machine stitched the mouth, since I already had black thread in the machine from my previous project, which still needs to be photographed and blogged.

IMG_2720
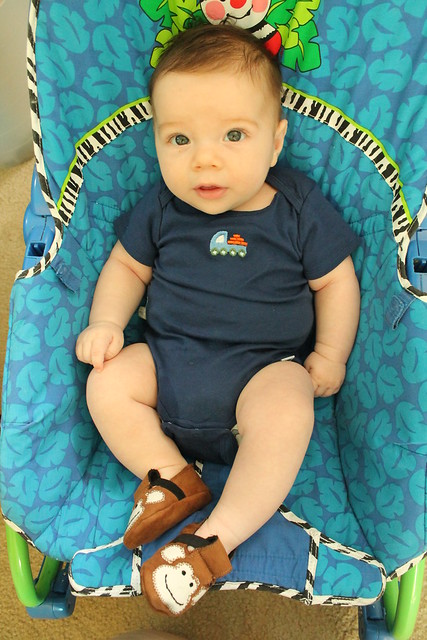
I also changed the closure. This one was originally two ribbons to tie into a bow. Hobbit is a very active baby, though. And kicking is his main thing right now. So a one-ribbon strap with Velcro like some of the other views has was a much more practical option.

The monkey shoes originally had that velcro ribbon closure, but I got even lazier and used black elastic to make them fully slip-on. If I make another pair of these in a larger size sometime, I’m thinking I might go with a frog, because that monkey face shape is perfect for that, too!

I’m really glad I made these bigger than I thought I needed to. According to the measurements, he should have had room in an extra-small. I made the small, and while there’s room in the toes, it’s still a bit of a struggle to pull them on his feet. They were very quick to sew together, though. I got these done from start to finish in three naps. And if the weather ever gets cooler before he has a growth spurt, they’ll be good lightweight shoes for the fall.
IMG_2721
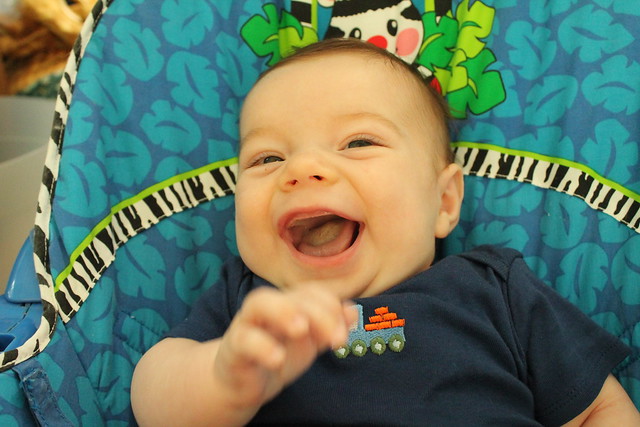
I’ll end this with a gratuitous outtake, because THAT FACE.

The Wardrobe Architect Project, Week 12: Accessories!

First of all, thank you all for the kind comments on my tea dress! I’m a little overwhelmed, in a good way, at how much love it got. This seriously might be one of my most-commented-on projects ever. Including the wedding dress.

Normally, I’d do a monthly roundup here, but to be honest, my crafting has been very slow this month, and the tea dress is my only finished project. I do have two other sewing projects in the works, and am hoping to have a little more to show for them soon. Knitting has ground to a complete halt for now, particularly since I had a whopping 5 rehearsals in the span of a week last week, plus my retail job that is very office work-heavy (read: computer-intensive) for me this time of year, and consciously taking some time off of that was the best thing I could do for my hands. It worked–my carpal tunnel has been surprisingly well-behaved! Though I do hope to get back to that soon as well. In the meantime, since my MMM pledge is built to include handmade accessories, I figured it was high time I dealt with that particular Wardrobe Architect assignment.

Sarai divides them into functional vs. decorative accessories, so I’ll do the same.
Functional Accessories:
Shoes: I have to admit, I’m not much of a shoe girl. Mostly by necessity. I’ve lamented about how hard it is to find shoes in my extra-wide size many times on here before, thanks to a bony protrusion below my big toes that I’ve had my whole life. And when you’re looking at easily spending at least $80-120 a pop just to find functional shoes that fit, it definitely curbs your enthusiasm for buying them! (I get really excited on the rare occasions that I find shoes I like at the thrift store that fit!)

In fact, I can quite easily fit my entire shoe collection into one picture. And that’s including my slippers and my wedding/reception shoes!

I tend to gravitate mostly towards sandals in the summer, except for the garden center job (closed-toe shoes are required, so I just wear my sneakers). During the cold weather, I mostly wear either my boots, or if it’s not too cold and/or wet, a couple pairs of basic flat casual shoes. As you can see, the majority of my shoes are either black or brown, so they can go with as many things as possible. I also have a tendency to wear them to death. Those brown boots are the newest addition, and that was because the brown boots I’ve had since partway through college were finally starting to kick the bucket–we’re talking multiple tears in the shaft lining and an actual hole through the soles on top of the heel. (It was sobering to realize that the boots were over a decade old, but at least I got my money’s worth out of them! Hopefully the new ones will last just as long.)

So in short, my general requirements are neutral, well-made, fairly reasonably priced, and comfortable. (Did I mention my feet are also ridiculously blister-prone?) You have no idea how many times I’ve been tempted to look into shoe-making as a hobby. At least then I could have some shoes in fun colors.

Bags: I tend to just carry one purse around, usually ones that my mom has made from fun print fabrics. I usually switch it up every 6 months or so, and do brighter colors in the spring/summer and more neutral/earthtone in the fall/winter. She’s perfected one particular pattern for me that fits all three of my requirements: cross-body strap, plenty of pockets, and big enough to carry a book or my Kindle. For the retail job, I’ll just stuff the entire purse into a tote bag to keep it from getting dirty/give me extra space for my lunch and drinks. My flute bag is also frequently a factor, though it’s a backpack style one. (Which is why I like the cross-body straps, because then I don’t have to worry about balancing them.) Sometimes I’ll downsize to a smaller purse for day trips to reduce the weight, though I still like them to be large enough for my SLR camera.

Hats: I mostly wear these in the winter to keep my head warm, and my only requirement is not wool, due to the allergy issues. I probably should wear hats more in the summer to keep the sun from burning my face, but I honestly think they make me look pretty dorky.

Gloves/handwarmers: Again, mostly a cold-weather thing, and I’m sure I will continue to knit lots of these, since my hands are generally the first thing to get cold.

Scarves: I rarely leave the house without the functional knitted ones when it’s cold.

Belts: When I wear them for functional reasons, it’s generally to keep my jeans in place.

Sunglasses: I have one pair, which I keep in my purse and mostly use for driving or walking around outside on a sunny summer day.

Decorative Accessories: 
Jewelry: Love me some jewelry. Aside from clothes, this is what I’ve been DIYing the longest. I’ve got 4 jewelry displays in this picture, and that’s not even all of it! I have another full rack on the other side of the mirror, as well as a box for bracelets and such.

I mostly like chunky or beaded necklaces, dangly earrings, Celtic knot designs, stuff like that. Most of my chain-type necklaces are silver, though I do have a few things in a more matte/antique gold or copper. I also almost always wear simple silver studs in my second ear piercing. I used to wear a lot of rings, like almost every finger, but have slowly gotten away from that in the years since college and now just wear my wedding/engagement rings. I’m also getting more into bracelets, though I’ll only wear them on my left arm because I’m right-handed and they’re less in the way there.

Even though I obviously have a lot of jewelry, I’m kind of missing making it now. I really should bust into the bead stash and make some new earrings or something. I might need something to help me get through my pledge this month!

Belts: I have a few that I wear more for waist-cinching looser tops, like those wide elastic-type ones. I’d like to get a few more decorative belts in different widths and colors.

Scarves: It’s really only been in the last year or so that I’ve started playing around with the more fashionable ones. My go-to was always necklaces, and I was worried about them getting caught on my flute. Which they sometimes do, tbh. But I’m also starting to like the extra warmth on my neck, and I’ve learned a way or two to tie them that makes them shorter and less prone to snagging on my instrument. Plus I’m kind of loving that infinity scarf I made from the Plantain leftovers.

Honestly, I’d like to try out some of those little knitted shawl/scarf things, too. The small ones that don’t look granny. But I need to finish a few knitting projects first.

So I guess that pretty much sums things up for now! As far as things to add go, I know I could use a few more pairs of earrings in my palette colors–black and the warmer tones in particular–and a few more scarves and decorative belts. I’d also like to dye my wedding shoes, since it’s my one shot to have a fun color! Though I wonder if the crystal embellishment bit makes them too fancy regardless…

Top 5’s of 2013, part 4: Knitting and other craftiness

Because those things deserve recognition, too, right? So here’s all the things that weren’t sewing clothes.

Top 5 hits of 2013: 
IMG_0538
1. The Branching Out mitts that I knitted. Look, I did colorwork! And they’re soft and cute and from a pattern I already had on hand. And I used the yarn in a fairly timely fashion, so win all around. I did have a bunch of this yarn leftover, but I’m actually using the leftover blue in a current project, which I will blog about when I have more to show for it.

2. The “Project Life” scrapbooking system. I started playing around with this during the summer as a way to try to stay more on top of my scrapbooking and document newlywed life. For those of you who don’t scrapbook, the basic concept is that you can get these kits with pocket page protectors, cards that fit into those slots, and then you just add your writing and photos and you’re basically done. Most people seem to do one spread a week. I’ve been doing more of a system of add stuff as I have photos for it or things I want to write down, occasionally mixing in more “traditional” scrapbook layouts, and go on a more month-by-month basis. I can’t say I’m caught up, but it really is making it easier to scrapbook on a more regular basis–it’s so easy to just grab the stuff, sit in front of the tv, and see what fits where. I’m also able to use some paper and stuff I already have, just slicing it down to size. I haven’t showed too much of that on here, so here’s a sampling of some things that I’ve (mostly) already gotten done!

Scrapbook Layouts, 2013

It’s not all pocket pages, obviously. The top two show what I’ve been doing when I have a “real” scrapbook page on one side–I’ve been making my own cards here and there to coordinate with whatever the main page is. The bottom left-hand corner is a finished page, from a concert that I went to over the summer with two of my closest friends, the bottom lowest right is one of the straight-up Project Life pages, though with a few additional filler cards that I made or printed myself, and the one above that is an in-progress one from the honeymoon. Yes, they’re all Instagram pictures of a little plastic TARDIS. Doug and I were having fun with that! I just need to print out the captions and paste them on, and then that spread is done, and same thing with most of my honeymoon pics. I’ve only gotten stuff through the end of the summer mostly done at the moment, but I’m still feeling much better about this particular hobby than I have for a couple of years!

TARDIS shoes!3. Geeky shoes. My bridesmaids and mom got a huge kick out of our mostly Whovian shoes for the wedding reception! And I have occasionally worn mine since, though not recently since it’s been wet and icy a lot lately. Not the best scenario for painted canvas footwear.

Roheline cardigan (in progress)4. It’s nowhere near finished, but I’m going to add my Roheline cardigan. This is what it currently looks like. I have a long way to go, but once I got past the initial trouble with starting it, it’s been a pretty easy knit, albeit slow. I think my stockinette knitting is starting to look pretty nice and even, which is why I’m calling this a win, even if it’s still in progress! And now that I finally understand what it means by “wrap and turn” on the short row sections, the top will look even better.

5. Making things for others. Yes, this includes sewing too, but I tend to often be selfish in my crafting, and I did make more things that were gifts for other people this year. So that makes me feel pretty good.

Top 5 misses of 2013:
IMG_0509
1. The scarf I knitted for Doug near the end of last winter. It was successful for stashbusting, but he hasn’t really worn it at all so far this winter. This isn’t a criticism, because he does wear the hat I knitted for him in 2012 all the time! He just doesn’t get as cold as I do.

IMG_05132. The bedroom curtains, to some extent. They do block more light than the blinds do alone, though it still can get way more bright than I like in the mornings. They’re way shorter than I would have preferred. Note to self: Next time, be more generous with curtain yardage estimations.

3. Jewelry-making. Mainly because I just didn’t take the time to do any this year. Note to self: must start playing with beads again, because I have way too many of them not to!

4. Home decor crafting in general. I meant to do a lot more, but once again, time management and I didn’t get along so well, and I only got to the bedroom curtains.

5. Honestly, I can’t come up with a fifth thing, because that more or less encompasses everything I made this year! So let’s just say the time factor and leave it at that, since having more plans than I finished was a running theme this time around.

Finally, in the interest of not leaving projects unblogged, here’s the handwarmers I actually finished to wear to my retail job.

work handwarmersIt’s honestly not my best work–I messed up the very easy stitch pattern here and there because I was in a hurry, and the yarn is pilling very quickly, because my job is hard on them. The stripes don’t match up, and I don’t care, because I just wanted to get them done–though I did do a surprisingly good job of getting the thumb gussets to match the stripes without even trying! But they’ve been keeping my hands warmer than they would have been on their own, especially during October when I was still mostly sitting at an outdoor register. This is how I was wearing them then:
handwarmers
Yes, those are other gloves underneath. Along with a hat, a scarf, long underwear, at least 2 other shirts, and a 2-layer sporty winter coat. Incidentally, one of the main reasons I still want to sew a new winter coat rather than just use this one, other than fashion, is that the inner layer is fleece, and I’ve found that it’s really, really difficult to pull that on over my sweaters and blazer jackets, on the occasions that I forget to bring my “real” winter coat with me to switch to before I go do my teaching!

Aside from a couple of secret projects that I won’t post until after Christmas, and a few in-progress things, that pretty much wraps up 2013! I hope you all have a wonderful Christmas (or whatever you celebrate)!

The post you’ve all been waiting for!

I mean, I’m assuming you do want to see that little dress project that took up nearly a year’s worth of planning and postings on here, right?

So, at last: the One Dress to Rule Them All. And other handmade wedding goodness. (These aren’t the professional pics, so I may come back and edit this post to add some of those later. But these are featuring the shots that I was able to get from my family and friends. I’m also making these larger than usual.)

8700_10151653160197980_718630365_n

Full-length dress shot! This is me with my friend/honorary bridesmaid Nicole. I wasn’t able to have her as part of the wedding party, but she did the artwork for my invitations and programs, and also did my hair!

6512_10151653159422980_1480637199_nAnother full-length shot, this time from the first dance. You can see the border sunflowers a little better on this one, I think.

5758_576995039012560_1066541998_n

Ceremony shot- not the best expression on my face, but it’s a good closer view of the bodice. And Doug’s tie. And my bouquet!

1044156_576995289012535_1476750130_n
This was as we were all leaving the church–and a great shot of the back!
1044856_576995665679164_1044450457_nMe and two of my bridesmaids/long-time best friends, Cassie and Julie. The headbands turned out ok after all!
1014281_576995975679133_1477030337_nProof that the TARDIS/R2-D2 shoes made an appearance! We all changed into them after we were done with the outdoor bridal party pictures.
999257_576996245679106_440699499_n
And I’m just including this shot because I think it’s fun, even though I look like I’m posing for one of those old Sure deodorant commercials! The DJ had Doug and I do this game where we each had to sit back to back while holding one of our shoes and one of the other’s shoes, and raise the shoe for the person we were answering for. I’m pretty sure this one was “which person has the crazier friends.” (I love my crazy friends!)

So there you have it–I hope the post was worth the wait!

(In case you’re newer to reading this blog, a few quick project notes: The bodice and waistband are based on Sewaholic’s Cambie dress. I modified it to make the upper back and sleeve caps sheer, and changed the darts to princess seams for fitting reasons. The skirt is from Simplicity 2442, modified to lower the waist. I also used a lengthened version of the Sewing Cake Pavlova skirt for the tulle underlayer. And if you want to see all of the construction posts and notes and multiple muslin attempts, you can click here.) 

Something old, something new…

One last wedding-related craft post! It’s probably no secret by now that I’m somewhat of a geek. I definitely lean more towards fantasy than sci-fi, for the most part, and am a little sad that I haven’t found a way to incorporate something Lord of the Rings-ish into my wedding. (Though my fiance did comment when we were picking out wedding bands that the one he picked out looked kind of dwarven to him…he was a much bigger fan of the Hobbit movie than LotR.) However, I do very much enjoy Doctor Who on the sci-fi end of things, and am super-excited that Tempest is hosting a Whovian sew-along for the 50th anniversary later this year! But I’m getting a little bit of a head-start…

Two out of my three bridesmaids, as well as my mom, are also fans. I quite successfully managed to get my fiance interested.  And after this scene from a couple of seasons ago, how could I not include something Who in the wedding?

(Not the best quality vid, but it was the only one I could find that would actually play for me and wasn’t a fan-made music video. Sorry.)

I was originally just planning on having a little fun with my tiny TARDIS and phone camera at the reception, since it seemed appropriate.(My maid of honor and I have been having fun over the last few months with taking Instagram photos of a little plastic TARDIS in random places, so you bet that’s going to be going with me on my upcoming trip!) But when my mom noticed that I’d pinned some painted TARDIS shoes onto my “Crafty Geekery” Pinterest board, she suggested that we get some shoes and paint them for the reception! She originally said for myself, my sis-in-law and her, but I pointed out that my maid of honor would want them, too. So with a little help from Sis and a lot of help from Mom, we ended up painting 4 pairs of these!

(Wow, my carpet looks awful–in my defense, I’ve been busy packing and planning a wedding!)

TARDIS shoesThis is basically the gist of them–SIL’s look a little different because when we told her we were doing this, she really wanted shoes without laces, so she has some slip-on canvas ones. We couldn’t find them in any other sizes (especially not mine), so the other 3 pairs are the standard lace-up Keds. The fun shoelaces were our addition, and my mom, my maid of honor, and I all now have different pairs of laces to go with.

As for my non-Whovian bridesmaid…I didn’t want her to feel left out. Like I said, she doesn’t really watch Doctor Who, but she’s been a huge  Star Wars fan for as long as I’ve known her, which is since we were kids. Her favorite character is Yoda, but I wasn’t really sure how to translate that to shoes (I always sucked the most at faces and figures in art class), and we wanted to do something where I could use the same paint we already bought for the TARDIS shoes.

R2-D2 shoesSo she gets R2-D2! Hmm… I wonder how it would look if I used my seam-ripper to get those Keds tags off of the tongues?

If I had $1000000, I’d buy you a green dress…

“….but not a real green dress, that’s cruel…”

Yeah, I had that song stuck in my head quite a bit while working on this project! Which, in typical fashion for me when sewing anything that might get worn to a wedding, ended up being much more difficult than I’d anticipated. I’ve spent hours and hours working on it this week, and it’s definitely got its issues. But the one and only dress I’d listed for the Fall Essentials Sew-Along is now done.

Last weekend, I was originally supposed to go camping with the friend I made the Anthropologie-esque aprons with. But we had to make a last-minute change of plans due to nasty weather forecasts–neither of us felt like camping in the rain and mud. So instead, she came here for a sewing day. The funny thing was, without planning it, we both ended up using the exact same fabric for our projects! We’d actually each bought some yardage of the same knit a couple of years ago when shopping at a Joann’s together, and neither of us had figured out what to do with it until now. So she copied a dress she’d borrowed from a friend, and I worked on this. It’s probably a good thing, too, because there’s no way I would have finished the dress before this Saturday’s wedding otherwise. I’m going to go ahead and do a full pattern review for this one, in hopes that it might help someone else down the line. (Especially since, as of when I wrote this review, this was the first one for this pattern on PR.)

Pattern Description: From the envelope: Lined, close-fitting dress has side front inseam pockets and attached petticoat with ruffles.

Pattern Sizing: 6-18. I (stupidly) made the 14.

Did it look like the photo/drawing on the pattern envelope once you were done sewing with it? Mostly.

Were the instructions easy to follow? The instructions were very well laid-out. The only confusion I had was finishing off the end of the zipper.

What did you particularly like or dislike about the pattern? I like the style, and the clear directions. I did not like the sizing–the whole thing seemed to run very large, and it caused me quite a few issues.

Fabric Used: I used a 2-way stretch knit that I’m pretty sure is a rayon for the majority (it’s been in the stash for awhile),  plus a tricot lining and polyester organza for the petticoat.

Pattern alterations or any design changes you made: I ended up having to make quite a few fitting changes. I didn’t make a muslin for this since I figured knits would be easier to tweak as I went. (Besides the aforementioned on-the-fly small-bust-adjustment that I NEVER have to make….) I also had to take about 4″ total out of the back, at least a good 2-3″ out of the back shoulder strap, and I spent several hours yesterday ripping out the side/back facings I’d sewed in earlier in the week so I could stay-tape those edges and hand-sew the facings back in. I didn’t know until I tried it on to double-check where I’d pinned up the hem that adding that facing stretched the sides out an extra 3″ each (!), and it was sagging out horribly under my arms. (See picture for how much I had to pin it in to get it to fit after machine-sewing the facings on!)

I also ended up having to gather up the fabric and tack it under the knot at the bustline, because the gathers were not falling right around the waistline. (It’s still sagging there, as you can see, but it’s definitely better than it was.) I also hand-picked the zipper topstitching, because I didn’t think my machine would be too happy about all of the layers around the waist between the fabric, the lining, and the elastic.

Would you sew it again? Would you recommend it to others? I would not sew it again, since this is a rather unique style and I don’t need two of these in my wardrobe. I would recommend it for more advanced seamstresses, with the caveat that you should probably take it down at least a full size from your usual pattern size. Possibly two. I’d also strongly recommend adding stay tape or interfacing before adding the back facings so it doesn’t distort as badly as mine did the first time.

Conclusion: I think it looks ok overall, and I’m certainly going to wear this since it was the pattern I’ve been most excited about sewing this fall. I’m thinking that if I add a belt, it’ll hide the slight wonkiness that is still around the waist seam. But I wish I’d gone with the thought I’d had about perhaps sewing size 12 instead. There’s a LOT of fabric in this dress, and it makes it somewhat heavy for a knit dress, and everything gets stretched. 


Other notes: The elastic was a pain in the neck to get into this dress. I actually ended up having to rip a hole in the lining with my seam ripper so I could better distribute the elastic within the casing. Also, pressing the petticoat section is kind of helpful–it was too poofy under the skirt at first, but after I flattened it out, it seemed to lay better. Even though that put creases in the organza that probably shouldn’t have been there. (The petticoat is still pretty poofy, but it is laying better now.)


I also kind of wish I’d hand-sewn in the entire zipper, because it isn’t entirely lined up at the waist. Though it doesn’t look that bad in this picture, to be honest–it seemed much more off to me in real life. And I couldn’t do anything to fix it because by the time I’d noticed it, I’d already trimmed the seams, and this is what’s holding the elastic “waist stay” in place.

So it’s done, and just in time for the wedding….though apparently we have a cold front coming in later today or tomorrow, and it’ll actually be feeling fallish on Saturday. So I hope I don’t get cold in this basically sleeveless dress!

This is the other thing I’ve been working on this week– I realized late last week that I didn’t really have any shoes to wear to this or the second wedding I’ll be attending in October. I’ll be wearing the little black dress for the second since I’m also on musician duty for that one, but for Saturday’s wedding in particular, I didn’t want to go too casual for the shoes since it’s basically a big ruched-up t-shirt of a dress. One rather frustrating trip to two different shoe stores later where absolutely nothing was even close to fitting and I learned that the trend for this season is 4″ stiletto heels that I would undoubtedly break an ankle if I try to do anything resembling walking in, I decided to just do a non-permanent refashion to the basic heels I already have. So, with the help of some clip-on earrings and some pre-made flowers I found at Joann’s, this is what I did to my brown shoe. (Singular, because I still have to do the second shoe, and that is on the agenda for today.) I did this at the beginning of the week, and I made a little tutorial for it over at Refashion Co-Op. And since the little flowers just clip on, I can easily go back to my basic brown shoe after. (If I want to. I actually like them much better with the flowers!) I’ll be doing a second pair of clips later in the month for my black shoes, since it’s a formal evening wedding and my shoes are, again, not quite fancy enough.

But first, once clip #2 is done, I think I am actually going to take a few days off from sewing. This dress left me feeling like I need a break before I dive into my next project, so I think the rest of my crafty free time this week will be taken up by knitting instead! (I do have things to show there, though none of them are finished, so I’ll try to do an update for that in a day or so.)

Nothing to show, but…

…I do have some things to tell.

#1: The Little Black Dress. I ended up turning the pleats into darts, and it looks much better. But I can’t show it now because I didn’t think to take pictures before finishing re-marking it and then deconstructing it for the real sewing. (Once I get the lining pieces cut out, that is. Which may or may not happen tomorrow.)

#2: The knitting thing. I’m still working on that same scarf. Though I think I probably got several inches done today, since I spent the better part of The Return of the King working on it today–movies with epic battle scenes are horrible ones to cut things out to! I’m hoping it’ll be long enough soon, because I think I’m ready to move on to something else…

#3 I didn’t bother taking pictures since I already showed something nearly identical, but I did make a second pair of those boot stuffer things this evening.

#4: I’ve also done my first full-bust adjustment! I’m doing the Pendrell Blouse Sew-along, which thankfully is moving along slowly enough that I’ve been able to work on that and the LBD at the same time. (In fact, other than double-checking my measurements, I really didn’t have to do a thing until post #6!) I also have that cut out as of last night, so I may have something to actually show before too long.

I like big boots and I cannot lie…

(Sorry…couldn’t resist the pun.)

Anywhoo…still no word from the instructor about that muslin, so I went ahead and did a quickie project.

I really do like my big tall boots. I started wearing them somewhere in the vicinity of the end of high school/beginning of college, and they’ve been my go-to winter shoe ever since. And I have to buy some pretty pricey ones in order to fit my oddly-sized feet (note to shoe manufacturers: extra-wide feet does not automatically equal extra-wide calves), so I pretty much literally wear them until they fall apart. (Actually, the first pair I got, I still have even though there’s holes in the sole of the heel– I’ve used them as my pirate costume boots with a little help from some self-stitched gaiters, and also as riding boots one summer that I took lessons, between my two years of grad school.) So this is to help them last a little longer, because they flop over at the ankles when I put them back in the closet after a day.

I got the idea from a recent post at Craft Apple, and it was really simple to sew–basically just an open-ended tube that’s stuffed and tied. And everything was stuff I had on hand: the fabric was from my scrap bin that I put together in last week’s organization binge, the cording was left over from lacing up the back of one of my Lord of the Rings-inspired costumes, and the stuffing actually busted an entire piece from my stash! I had almost a yard of this canary-colored fleece that I think was given to me for free, because I can’t think of any reason I would have bought it. And I had absolutely no idea what to do with it. So I chopped the entire piece into smaller bits and used that to stuff these. It might sound kind of wasteful, but in a way it was actually pretty practical–if I ever need to clean these since they’re inside my shoes, I can just untie the bags, dump all the stuffing into a mesh laundry bag and it’s completely machine-washable. And like I said, I couldn’t think of anything I’d actually sew out of it anyway. So there.One yard down, a thousand to go. Or something like that.

I’ll make a second set at some point– I have brown boots that are even older than these and also need some love. And I think I have just enough of the batik print left for a second pair. So I just need to figure out what to stuff it with. Maybe that yard of royal blue fleece that I’m also not sure what to do with…

Friday Favorites, Episode 42

Going to be a long one this time, since I have stuff saved from the last two weeks. So in no particular order…

Ok, that’s it for today… my big project for today, since my time of not working on Fridays is probably over (starting back at the garden center tomorrow), was experimenting with henna to dye my hair. And my time for letting it sit is getting close to done, so I have to go wash mud out of my hair. And then maybe I can go sew!